

Getting paid
Where: Finance
Three pages, and together they are how the money reaches you.
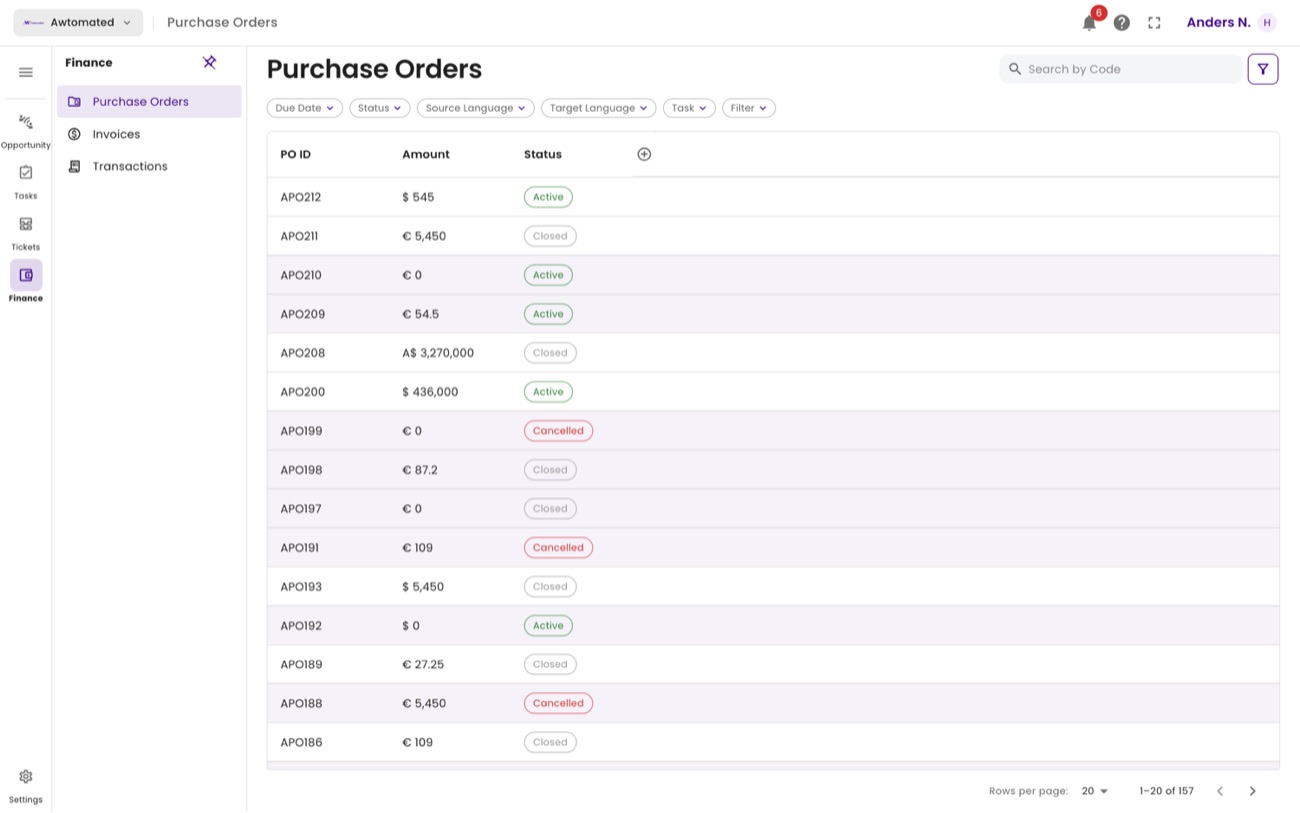
Purchase Orders. The agency’s commitment to pay you for one task, with the tax applied and whether you have invoiced it yet.
Raising an invoice from your purchase orders
Section titled “Raising an invoice from your purchase orders”This is the part that actually gets you paid, and it works differently from invoicing by hand. You never type an invoice. Every task you complete produces a purchase order, and an invoice is simply a selection of those orders bundled together. You tick what you want to bill, and Awtomated writes the invoice.
That is why one invoice can cover a single order or a whole month of them - the choice is yours at the moment you raise it.
Step by step
Section titled “Step by step”- Open Finance › Invoices. This is your invoice history, and the place every new one starts.
- Select Generate invoice at the top right.
- Wait while it collects your orders. The button changes to Generating… while Awtomated works out which purchase orders you are allowed to bill. This takes around twenty seconds on a busy account - it has not frozen, and selecting it again only starts over.
- Read the Purchase Orders window. It opens with every order available to you, one row each, showing its Code, Status, Start and End Date, Amount and the Task it pays for.
- Check anything you are unsure of. View at the end of a row opens that order in full before you commit to billing it.
- Tick the orders to include. Use the checkbox at the left of each row, or the one in the header to select every order at once - the usual choice at month end.
- Select Submit. One invoice is created covering everything ticked, and goes to the agency for payment. Closing the window with ✕ instead leaves everything as it was.
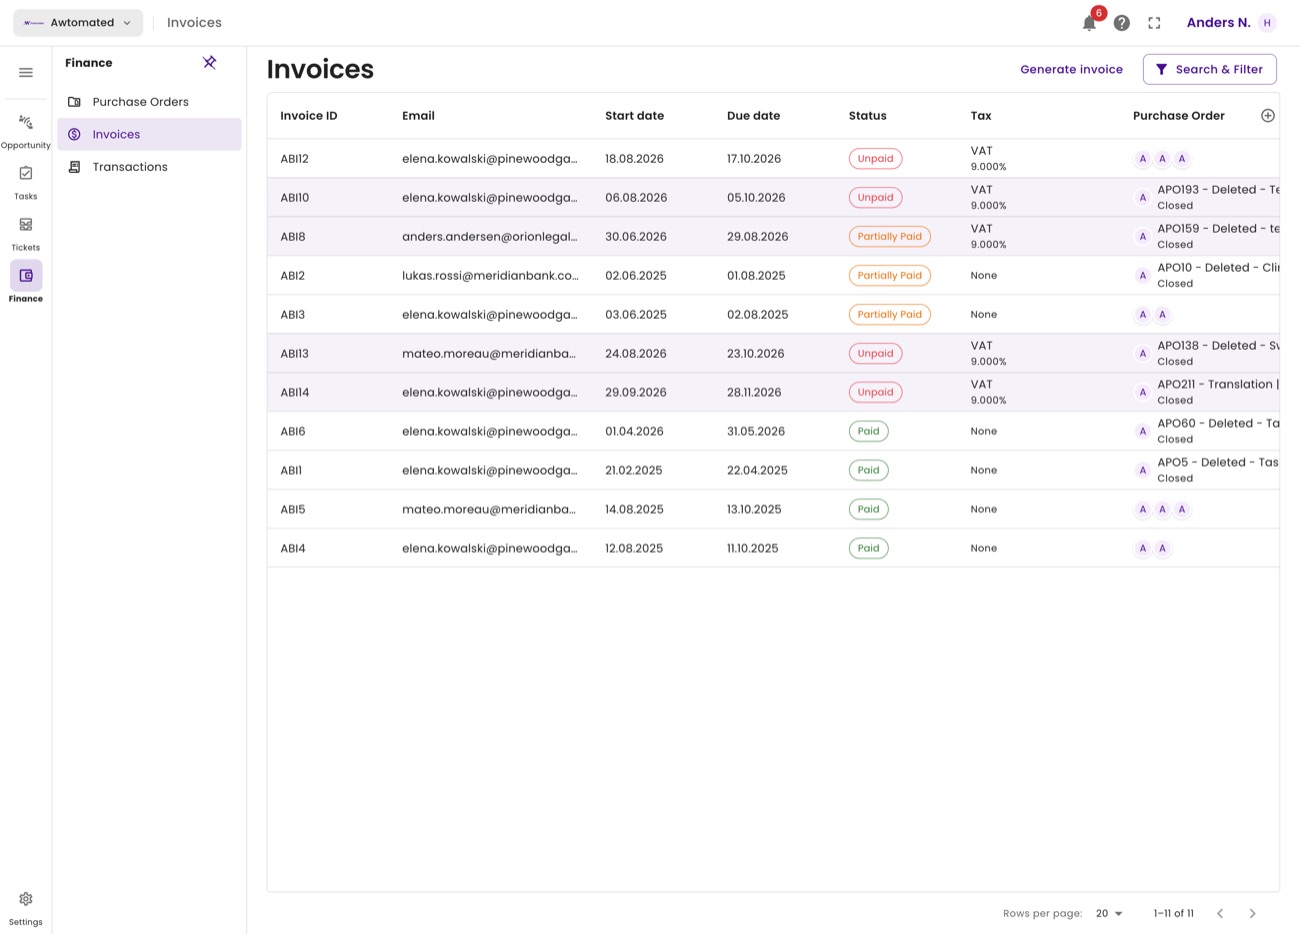
Steps 1-2. Generate invoice sits above your invoice history, next to Search & Filter.
Steps 4-6 - choosing what to bill. Every order available to you, with the task each one pays for. The checkbox in the header row selects them all.
| Column | What it tells you |
|---|---|
| Checkbox | Include this order on the invoice. The header checkbox takes everything. |
| Code | The order’s permanent APO reference. Quote it if you ever query a payment. |
| Status | Closed means the work is finished and the order is ready to bill. |
| Start / End Date | The period the order covers - useful when an agency pays per month. |
| Amount | What you will be paid for it, in the agency’s currency. Check this before ticking. |
| Task | The job it pays for, so you can tell two similar orders apart. |
| View | Opens the full order without leaving the window. |
After you submit
Section titled “After you submit”The new invoice joins the list on the Invoices page, and that list is where you track it from then on.
| Column | Means |
|---|---|
| Invoice ID | Its permanent ABI reference - the number to quote when chasing payment. |
| Start / Due date | When it was raised, and when the agency’s terms make it payable. |
| Status | Unpaid → Partially Paid → Paid. Partially paid means money has arrived against it but not the full amount. |
| Tax | The rate applied, for example VAT 9.000%, or None where no tax was due. |
| Purchase Order | Every order bundled onto this invoice. Several markers here means one invoice covering several jobs. |
Related: Where orders come from · Your rates · Querying an amount
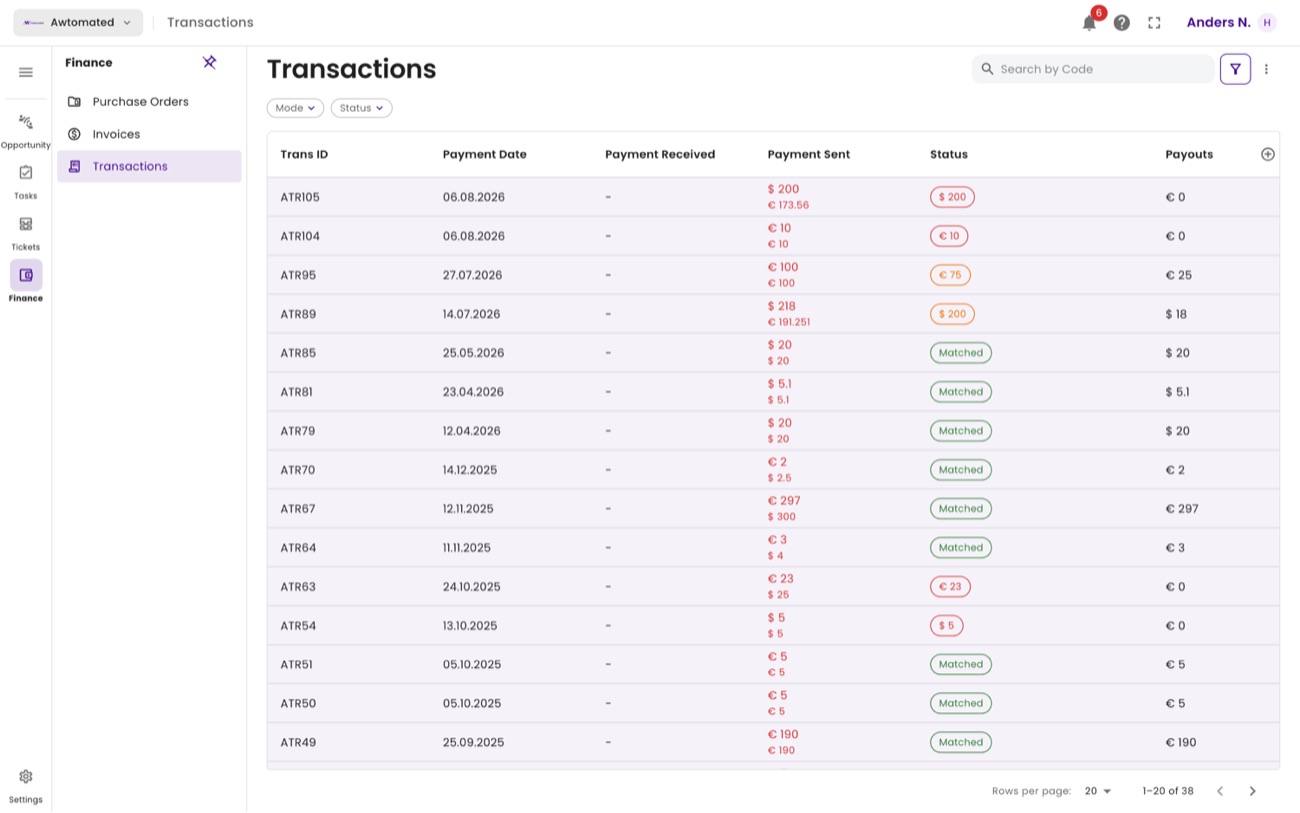
Transactions. Payments made to you, with the mode and bank reference so you can reconcile against your own records.