

How to Translate XLIFF and XLF Files in Awtomated (Step-by-Step)
XLIFF is the format your clients’ systems speak when they hand off content for translation: CMSs, app frameworks, other CAT tools. The job is simple in theory: fill in the targets and send the file back without breaking anything. Awtomated does exactly that, with a review step in between.
What is an XLIFF or XLF File in Translation?
Section titled “What is an XLIFF or XLF File in Translation?”XLIFF (XML Localization Interchange File Format) is the industry standard for exchanging translatable content. Each piece of text sits in a trans-unit with an ID, a source and a target. XLF is simply a shorter file extension for the same format.
Why Use Awtomated for XLIFF Translation?
Section titled “Why Use Awtomated for XLIFF Translation?”- Round-trip safe. IDs and structure are kept; only targets are written.
- Smart segmentation. Long units are split into sentences for the translator and joined back on export.
- Batch setup. XLIFF and XLF files with the same structure can be set up in one session.
- MT plus review in the same editor as every other format.
Step-by-Step: How to Translate XLIFF and XLF Files in Awtomated
Section titled “Step-by-Step: How to Translate XLIFF and XLF Files in Awtomated”Step 1: Upload your XLIFF file
Section titled “Step 1: Upload your XLIFF file”Go to Files > Upload in your project, select your XLIFF or XLF file and click Submit. The Column mapping window opens automatically. If you close it, open the file card later and click Create Editor File, tick the target language and choose Proceed with column mapping.
Step 2: Configure the mapping
Section titled “Step 2: Configure the mapping”Awtomated reads the file and offers its fields (id, source, target). Use Add Row to create one row per role and map:
- Key > id
- Source language (for example en-GB) > source
- Target language (for example de-DE) > target
Click Apply. If you uploaded several files with the same structure, the window shows “(1/2 Similar Files)” and offers Apply to all similar files, so you map the whole batch once. If that button is greyed out, click Apply on this file and map the next file the same way. Awtomated then creates the editor files automatically; open one from its card with Open in Editor.
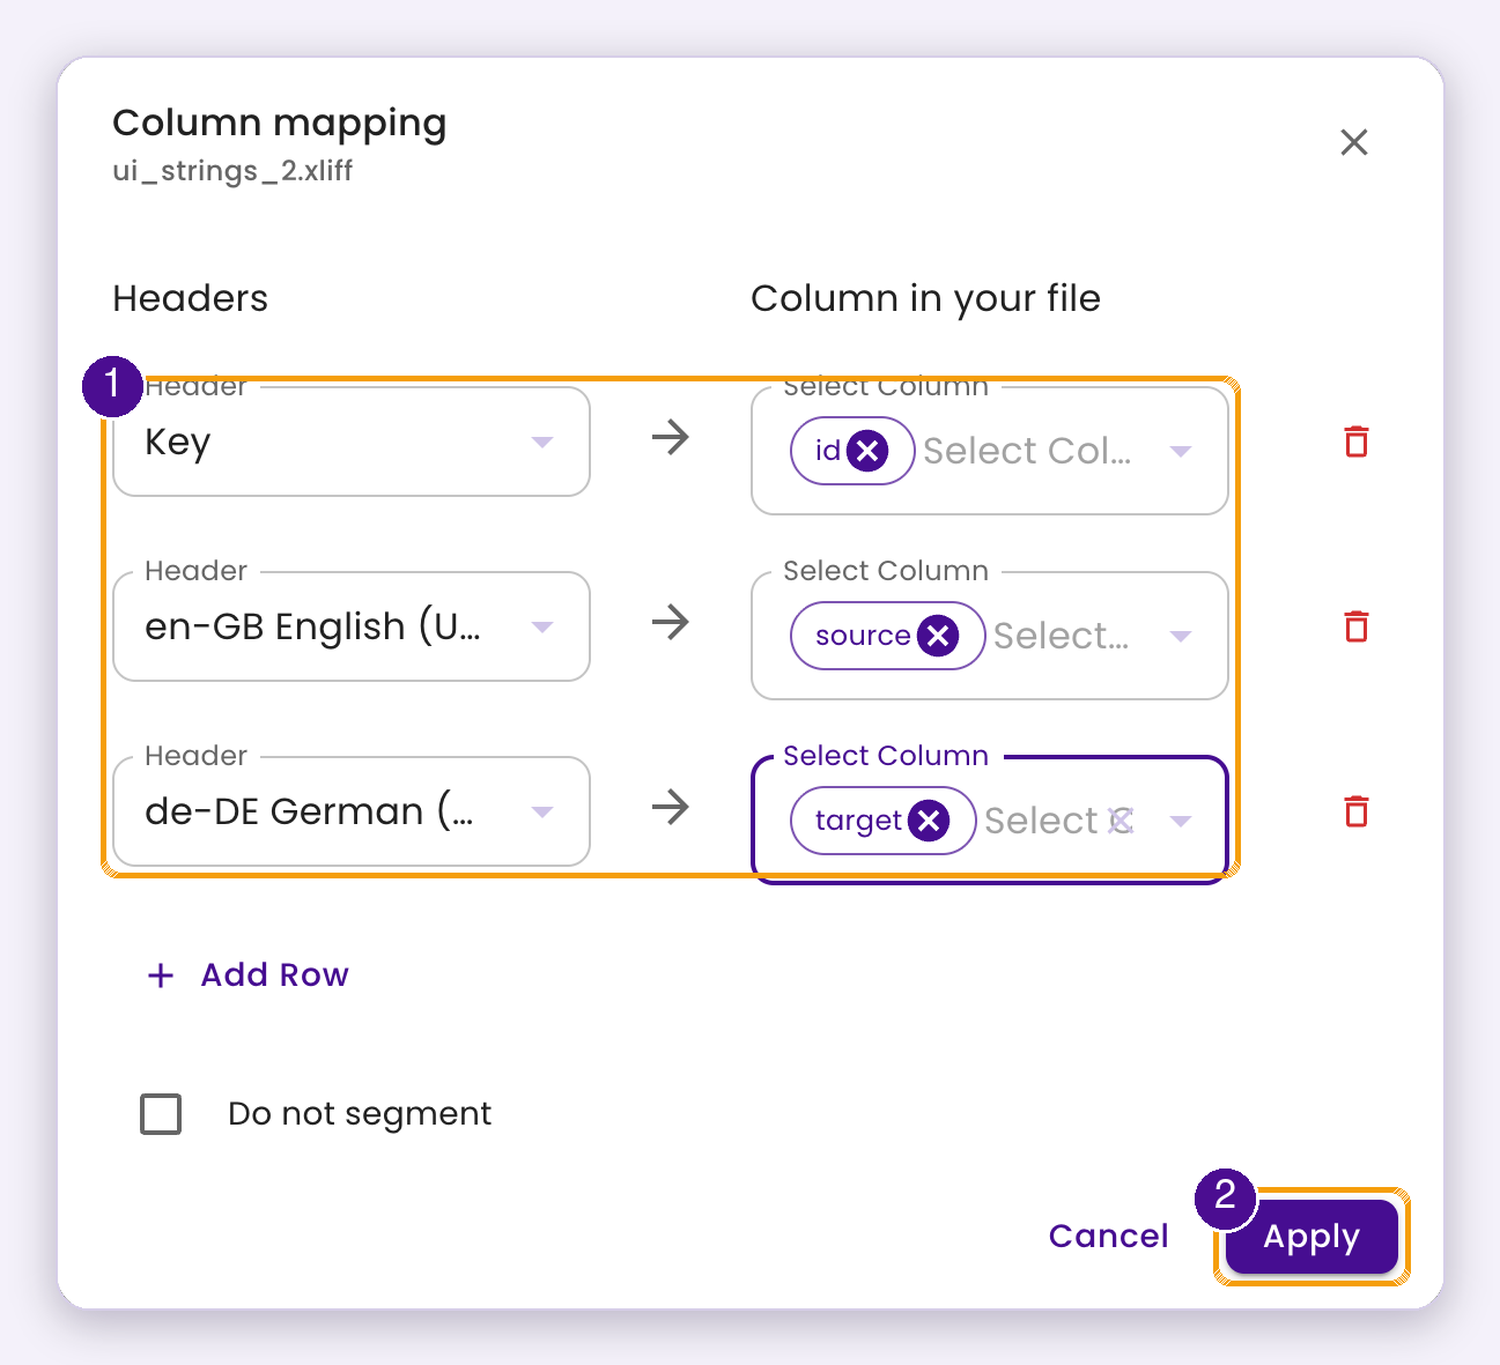
Map Key to id, the source language to source and the target language to target, then click Apply.
Step 3: Assign the task
Section titled “Step 3: Assign the task”Click Create Task in the editor and follow the short wizard (language, segments, task name and workflow stage), then assign the task to a linguist or vendor from the project’s Tasks tab.
Step 4: Translate in the editor
Section titled “Step 4: Translate in the editor”A trans-unit with two sentences becomes two segments, so translators work sentence by sentence. Pre-translate first: translate icon > DeepL or Microsoft > target language > Proceed, then Apply to all on the review screen. Post-edit afterwards and confirm each segment with Ctrl+Enter (Cmd+Enter on a Mac). Apply to all overwrites segments you have already translated. Placeholders such as {name} and {count} appear as plain text, so check they are still there after editing.
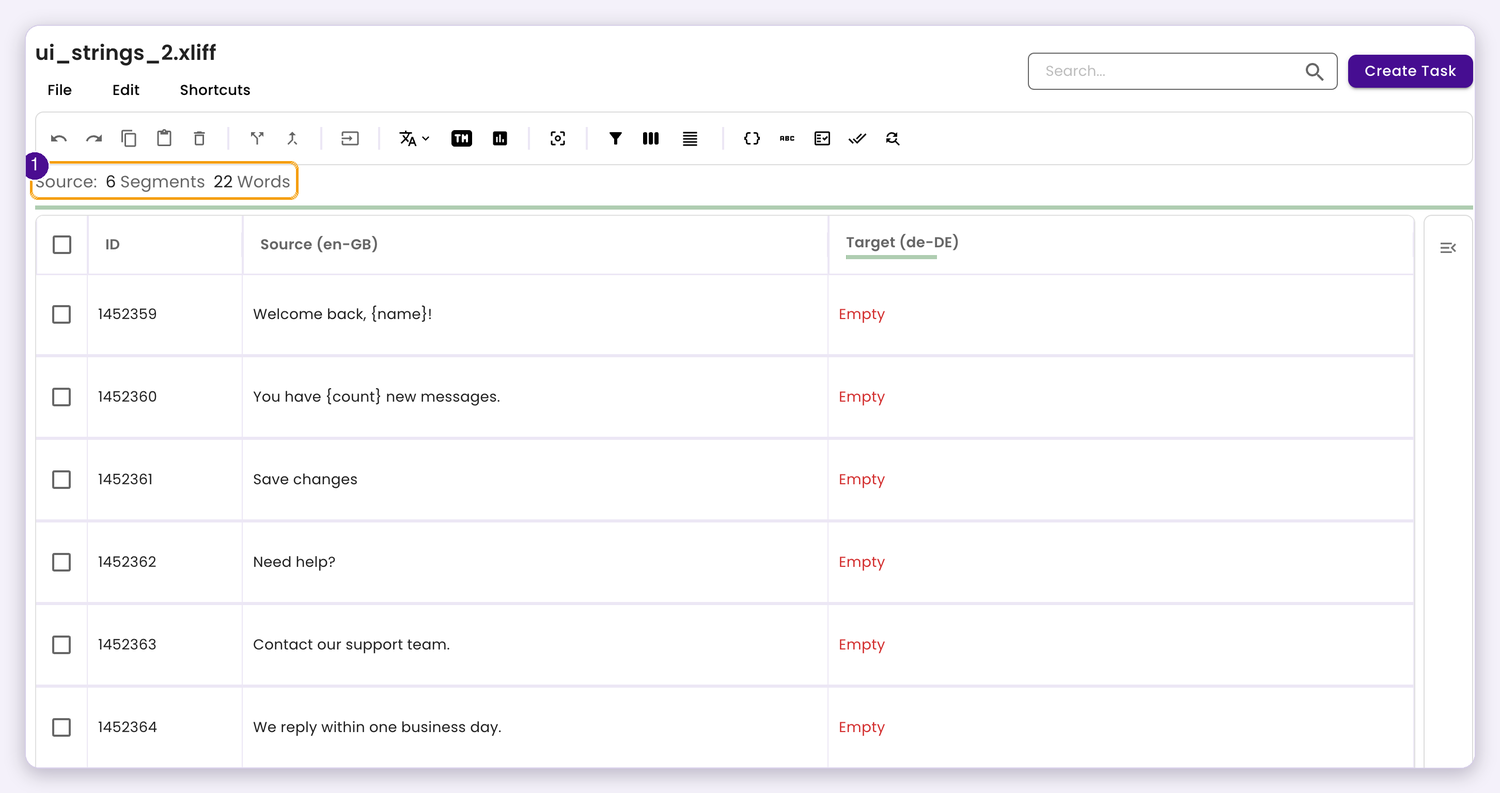
The XLIFF opens in the editor with every trans-unit split into sentences.
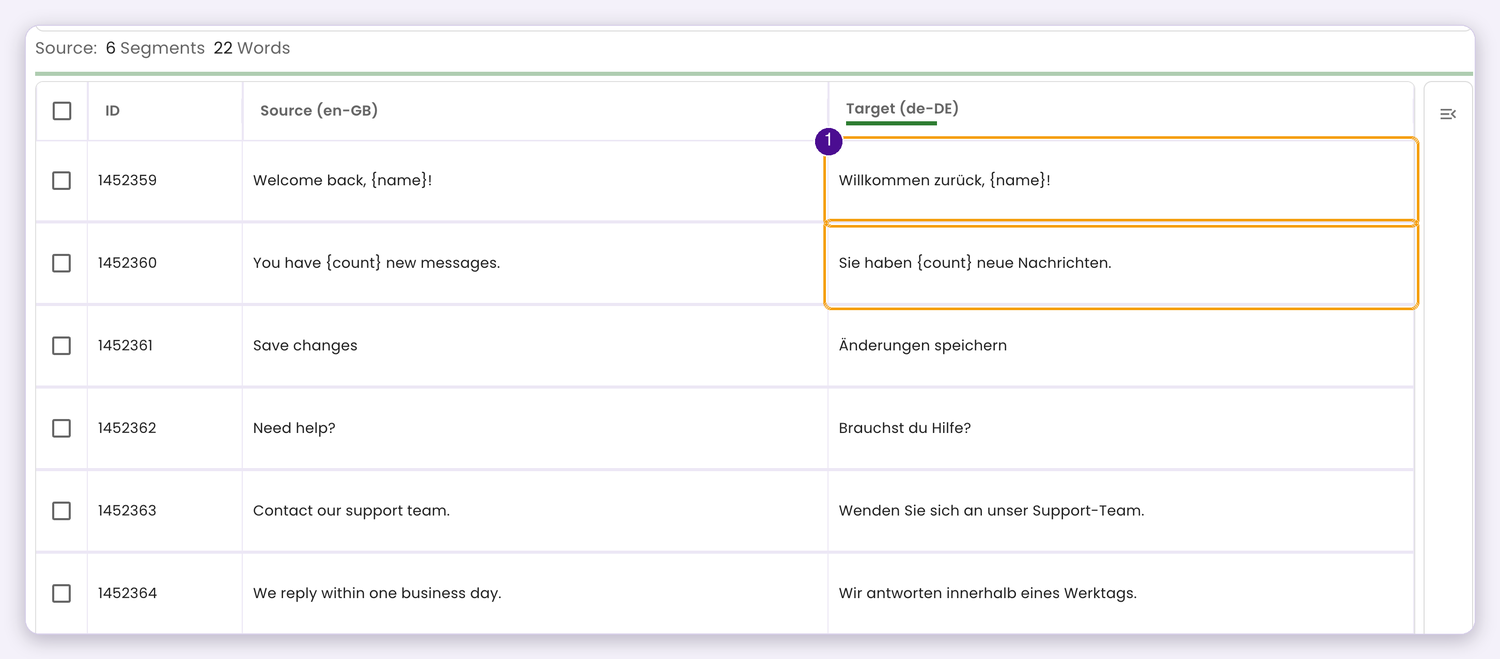
After DeepL, placeholders such as {name} and {count} are still in place.
Step 5: Review and export
Section titled “Step 5: Review and export”Go to File > Download as > Download as Original, choose the language and click Submit. The file appears under Completed Files (refresh the page if it isn’t there yet) with every target filled and split sentences joined back into their original unit, ready to re-import into the client’s system.
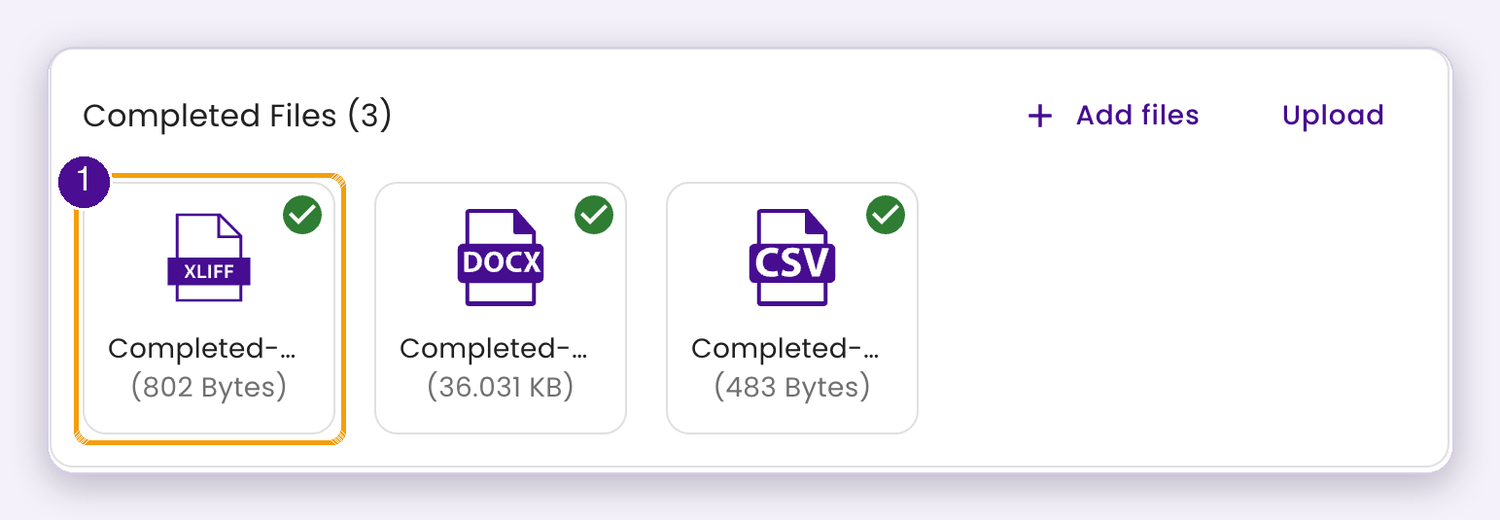
The exported XLIFF appears under Completed Files.
Pro Tips
Section titled “Pro Tips”- Map the target field even when it’s empty; that’s where the translation is written.
- Search the target column for { and % before delivery to confirm placeholders survived.
- Upload XLIFF and XLF files from the same source together so you set the mapping up in one go.
Benefits
Section titled “Benefits”- Clean round trips back into CMSs and apps.
- No manual editing of XML.
- Same review workflow as every other format.
Best Practices
Section titled “Best Practices”- Don’t rename the file before re-import; some systems match on file name.
- Validate the exported XLIFF in the client’s system on the first project.
- Check which target state the client’s system expects; the exported targets carry no state attribute.
Final Thoughts
Section titled “Final Thoughts”XLIFF is the handshake between your client’s tech stack and your translators. Awtomated keeps that handshake clean from upload to re-import. Book a demo and bring an XLIFF from one of your clients.
Ready to try it with your own files? Book a free demo or visit our website for more information about Awtomated.