

How to Translate CSV Files in Awtomated (Step-by-Step)
Product catalogues, e-commerce feeds, app strings and glossaries very often travel as CSV. The trap is obvious to anyone who has handled one: translate the wrong column and you break SKUs, prices or IDs. Awtomated lets you point at exactly the columns that need translating and leaves the rest alone.
What is a CSV File in Translation?
Section titled “What is a CSV File in Translation?”CSV (comma-separated values) is a plain-text table: one row per line, columns separated by commas. Usually only one or two columns hold translatable text. The rest is data that must survive translation byte for byte.
Why Use Awtomated for CSV Translation?
Section titled “Why Use Awtomated for CSV Translation?”- Column mapping. You choose the key column and the source-language column; nothing else is touched.
- Batch setup. Files with the same columns can share one mapping.
- MT plus review. DeepL or Microsoft pre-translation, then human post-editing.
- Clean output. The original columns stay as they were and the translation arrives in its own column.
Step-by-Step: How to Translate CSV Files in Awtomated
Section titled “Step-by-Step: How to Translate CSV Files in Awtomated”Step 1: Upload your CSV file
Section titled “Step 1: Upload your CSV file”In your project go to Files > Upload, select your CSV and click Submit. The Column mapping window opens automatically. If you close it, open the file card later and click Create Editor File, tick the target language and choose Proceed with column mapping.
Step 2: Configure the column mapping
Section titled “Step 2: Configure the column mapping”In the Column mapping window, set one row per role (use Add Row for the second one):
- Key > the column with a unique ID per row (for example the SKU column, A).
- Source language (for example en-GB) > the column with the text to translate (for example the Description column, C).
Tick Do not segment to keep each cell as one segment instead of splitting it into sentences. Click Apply. Awtomated creates the editor file automatically; open it from its card with Open in Editor. If other files share the same columns, the window offers Apply to all similar files.
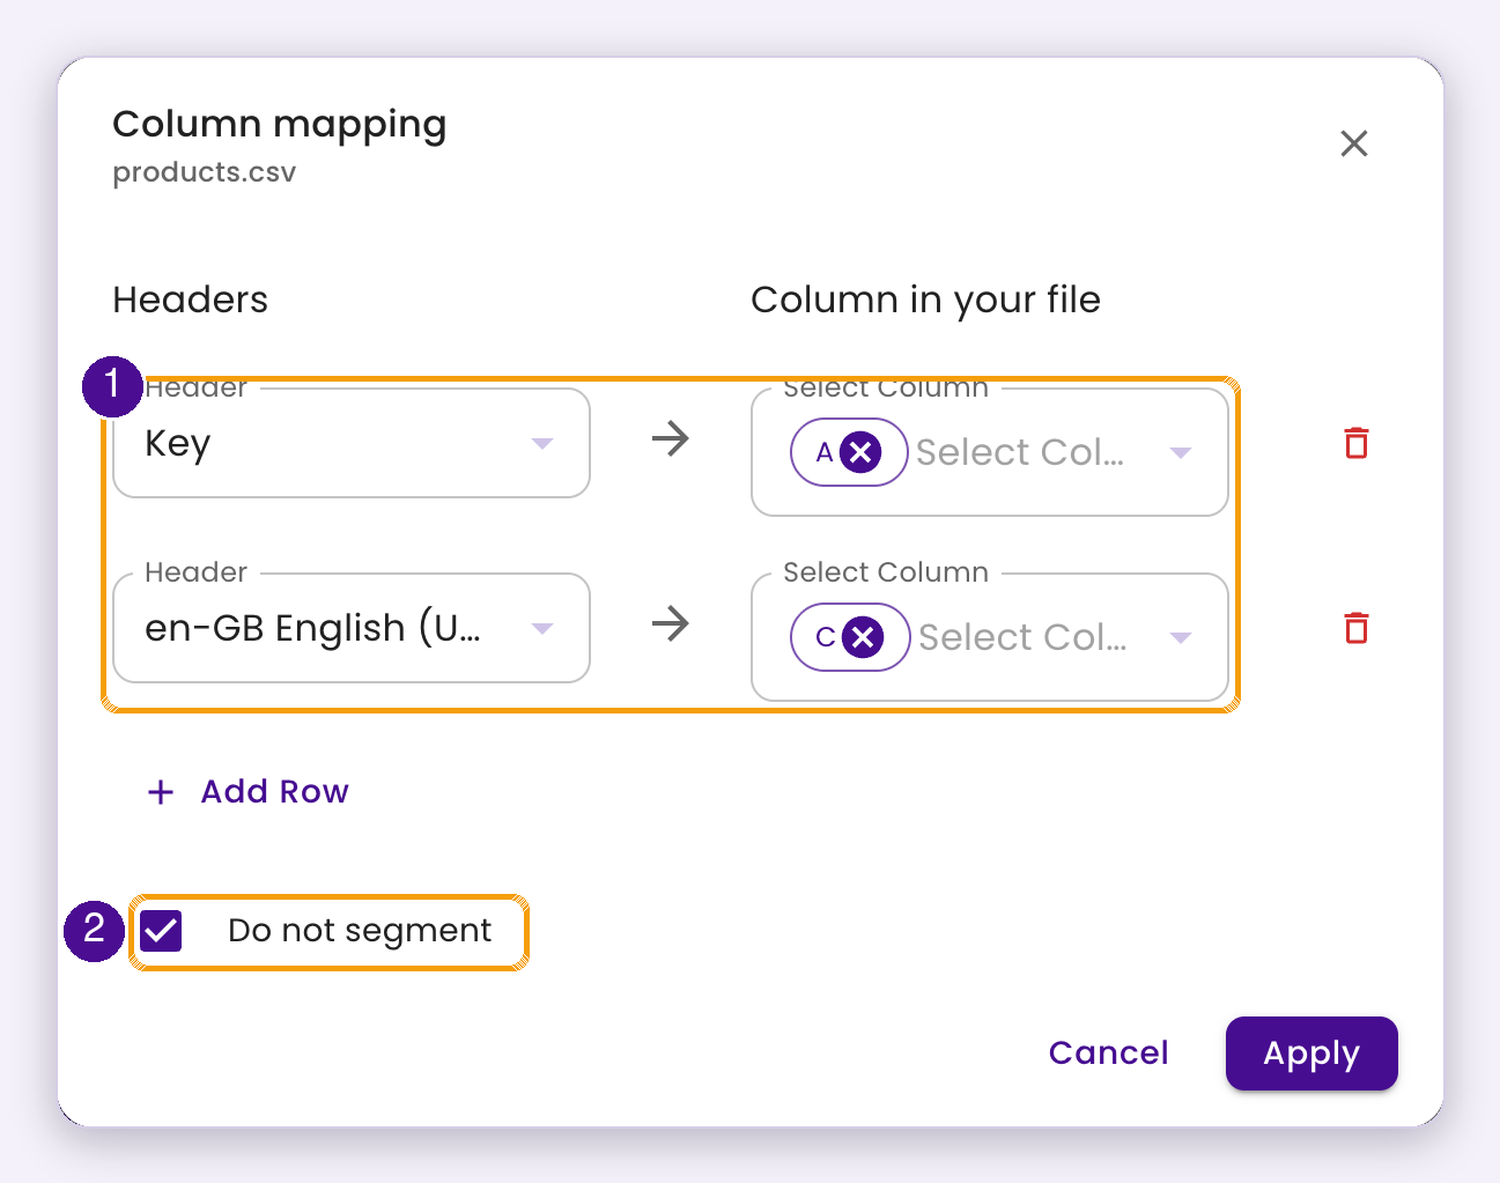
Map Key to the SKU column (A) and the source language to the Description column (C). Tick Do not segment, then Apply.
Step 3: Assign the task
Section titled “Step 3: Assign the task”Click Create Task in the editor and follow the short wizard (language, segments, task name and workflow stage), then assign the task to a linguist or vendor from the project’s Tasks tab.
Step 4: Translate in the editor
Section titled “Step 4: Translate in the editor”Each mapped cell becomes a segment. Pre-translate first: click the translate icon, pick DeepL or Microsoft, select the language, click Proceed, then Apply to all on the review screen. Post-edit afterwards and confirm each segment with Ctrl+Enter (Cmd+Enter on a Mac). Apply to all overwrites segments you have already translated.
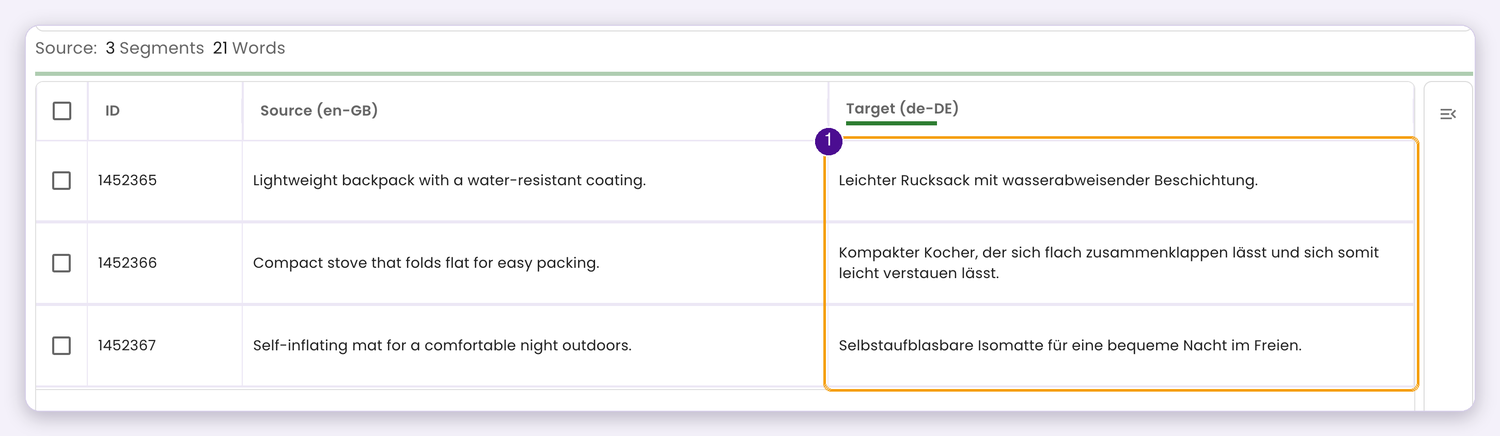
Only the mapped Description cells appear as segments, one per product.
Step 5: Review and export
Section titled “Step 5: Review and export”Go to File > Download as > Download as Original, choose the language and click Submit. The file appears under Completed Files (refresh the page if it isn’t there yet). Your translation is added as a new column named after the language (for example de-DE), next to the untouched source data.
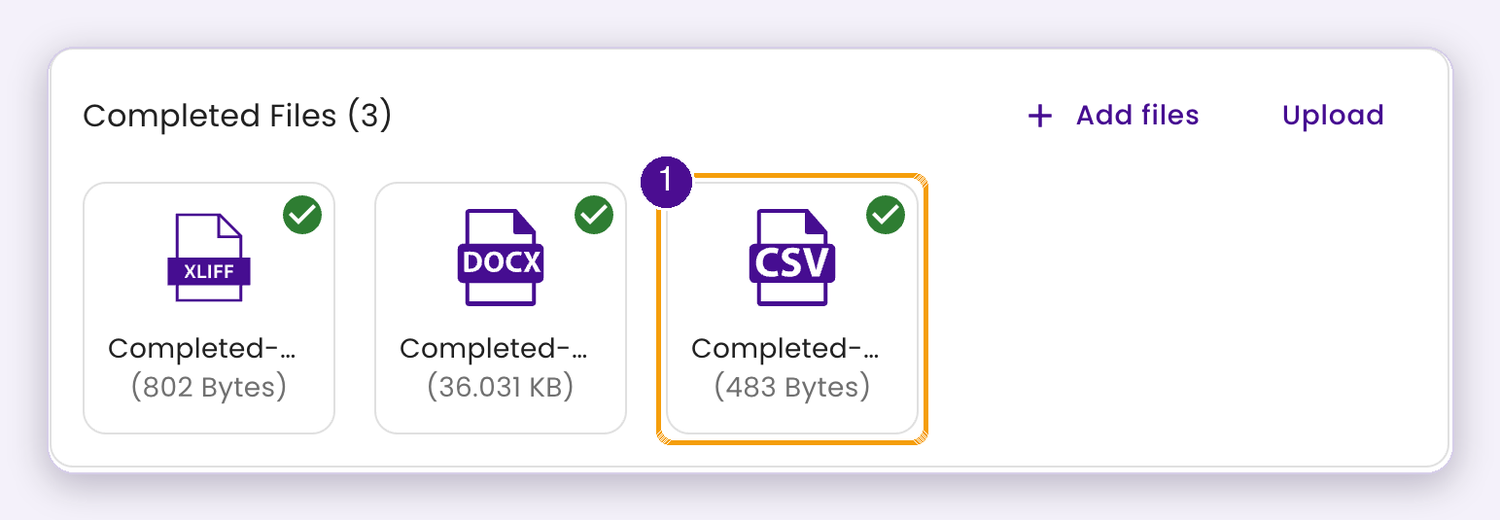
The exported CSV appears under Completed Files.
Pro Tips
Section titled “Pro Tips”- Map only text columns. Never map prices, dates or IDs as source.
- Use Do not segment for short product names so they stay one unit.
- Keep the new language column name if you plan to re-import the file into a CMS or shop system.
Benefits
Section titled “Benefits”- No broken SKUs or prices in client deliveries.
- One mapping covers a whole batch of identical exports.
- Translators see only the text, not the data around it.
Best Practices
Section titled “Best Practices”- Save CSVs as UTF-8 so accents and umlauts survive.
- Keep a header row; the mapping uses it.
- Open the exported CSV in a text editor or spreadsheet to confirm the new column before delivery.
Final Thoughts
Section titled “Final Thoughts”CSV files look simple until a translator overwrites a price column. Column mapping in Awtomated removes that risk and turns catalogue jobs into a repeatable workflow. Book a demo and bring one of your own product feeds.
Ready to try it with your own files? Book a free demo or visit our website for more information about Awtomated.