

How to Translate DOCX Files in Awtomated (Step-by-Step)
Word files are still the backbone of most translation projects: contracts, manuals, marketing copy, HR policies. The problem is rarely the translation itself. It is everything around it: copying text out of Word, keeping formatting intact, chasing versions by email and rebuilding the final file. Awtomated keeps the whole DOCX workflow in one place, from upload to delivery.
What is a DOCX File in Translation?
Section titled “What is a DOCX File in Translation?”DOCX is Microsoft Word’s file format. Behind the scenes it is a package of XML files that store the text, styles, tables and images. For translation, that means the text can be extracted and translated while the structure stays untouched. A good workflow translates the words and leaves bold, italics, headings and layout exactly where they were.
Why Use Awtomated for DOCX Translation?
Section titled “Why Use Awtomated for DOCX Translation?”- No copy-paste. The file is segmented for you, sentence by sentence.
- Formatting stays safe. Bold, italics and similar formatting appear as numbered tags around the text instead of raw code.
- MT plus human review. Run DeepL or Microsoft on the whole file, then edit what needs a human touch.
- One place for the project. Files, tasks, vendors and deliveries live in the same project.
- Original format out. You deliver a DOCX, not a spreadsheet of sentences.
Step-by-Step: How to Translate DOCX Files in Awtomated
Section titled “Step-by-Step: How to Translate DOCX Files in Awtomated”Step 1: Upload your DOCX file
Section titled “Step 1: Upload your DOCX file”Create a project (or open an existing one), go to Files and click Upload, select your DOCX and click Submit. Awtomated converts it into an editor file automatically within a few seconds. You’ll then see two cards with the same name: the original file and the editor file. Click the editor file’s card (the one with the Awtomated icon) and choose Open in Editor. The editor opens in a new tab.
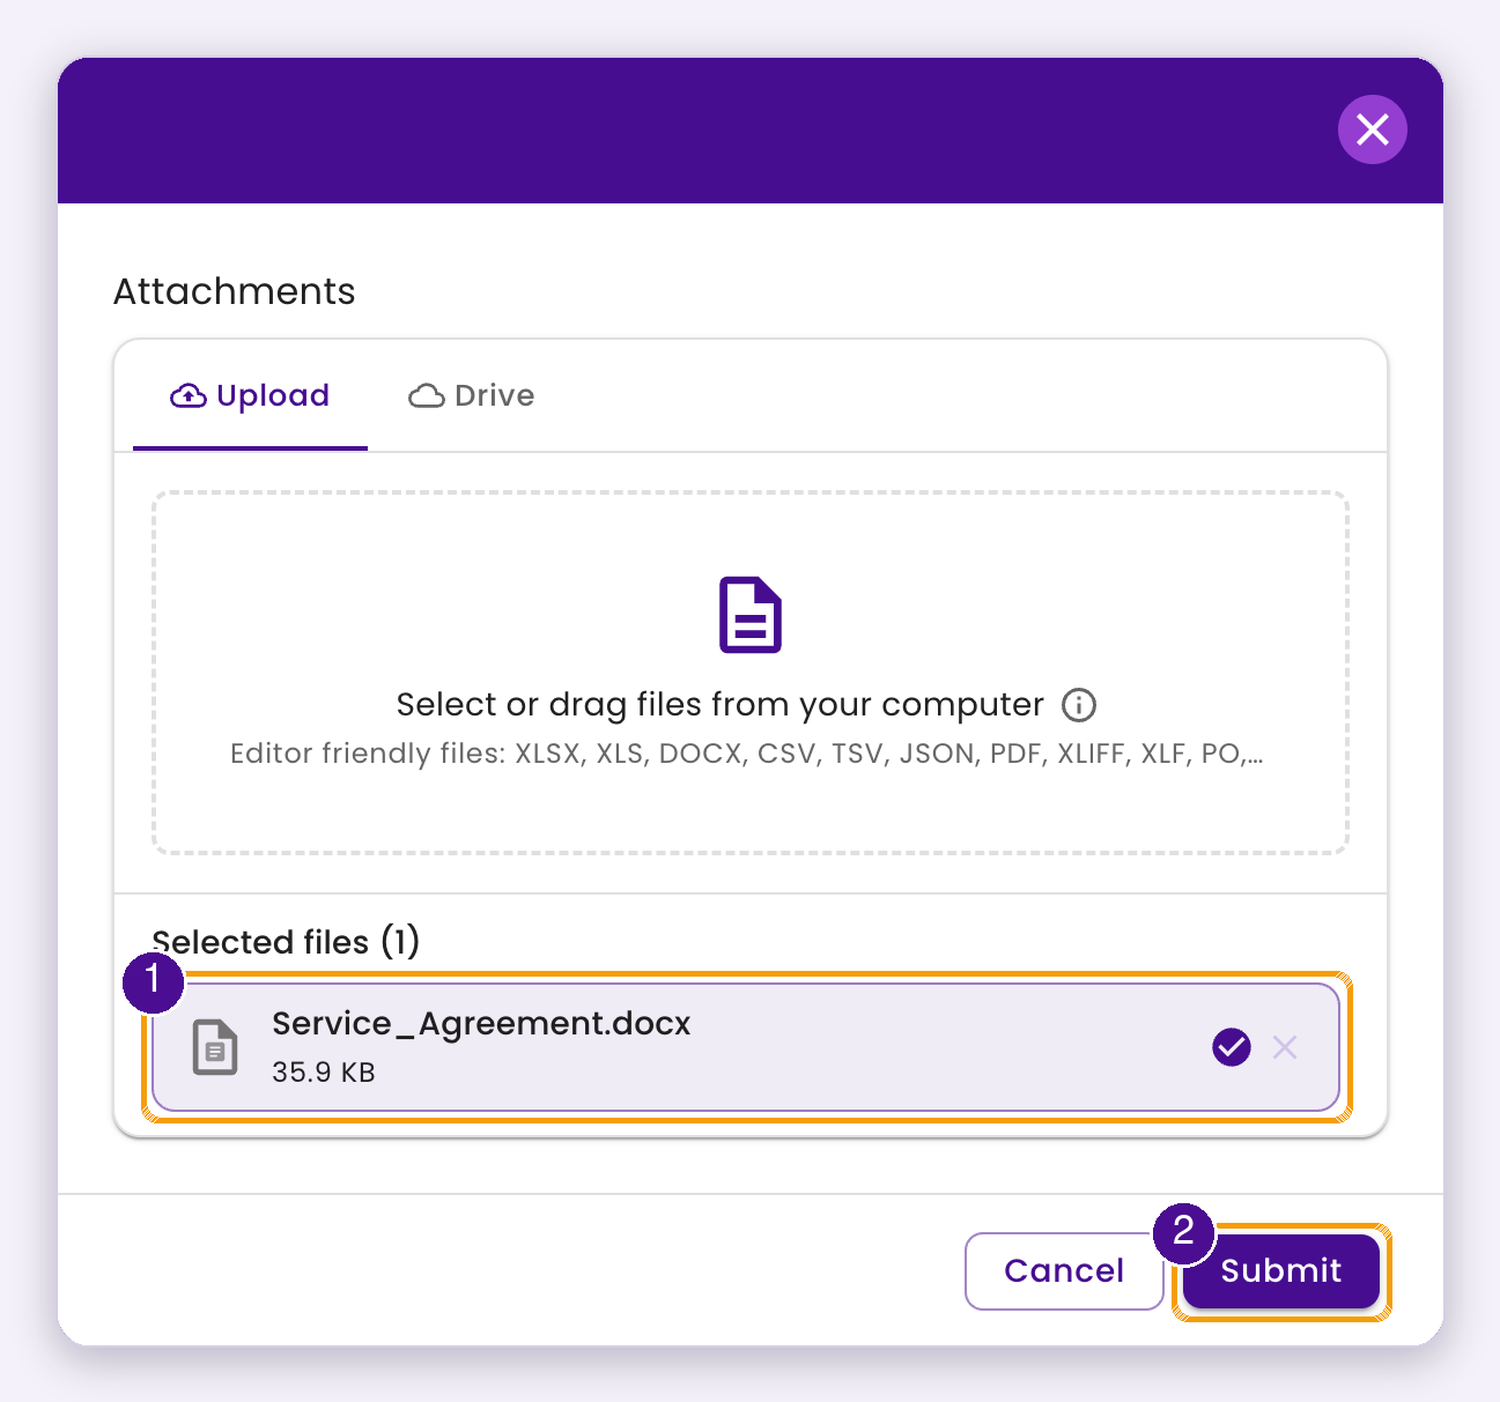
Select your DOCX in the Upload window and click Submit.
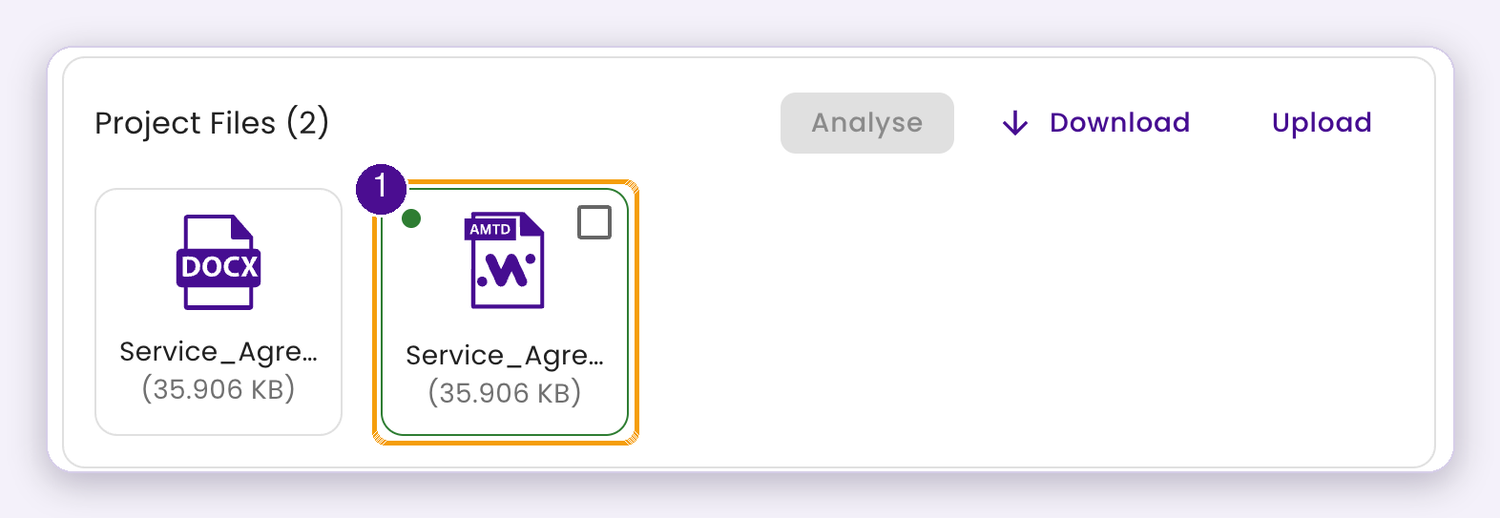
Two cards appear: the original DOCX and the editor file. Click the editor file.
Step 2: Check the segmentation
Section titled “Step 2: Check the segmentation”Open the editor file. The header shows how many segments and words the file contains. Formatting such as a bold title appears as numbered tags, for example {1}Service Agreement{1}. Leave the tags in place in your translation so the formatting comes back in the final file.
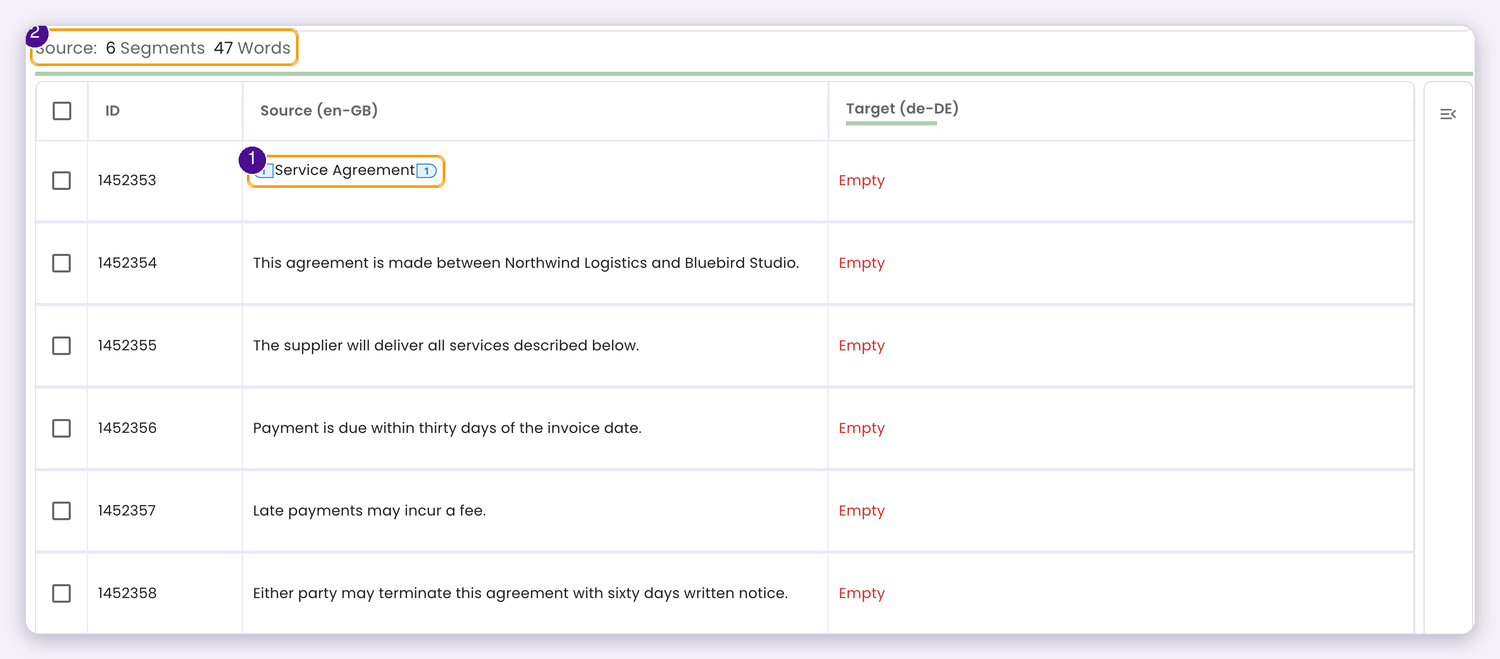
The header shows the segment and word count; the bold title appears between numbered tags.
Step 3: Assign the task
Section titled “Step 3: Assign the task”Click Create Task in the editor. A short wizard asks for the target language, which segments to include and whether to split the work into several tasks. Then give the task a name, pick the Workflow Stage (for example Translation) and click Submit. Open the new task from the project’s Tasks tab to assign it to a team member or vendor. Everyone works on the same file, so there are no versions flying around by email.
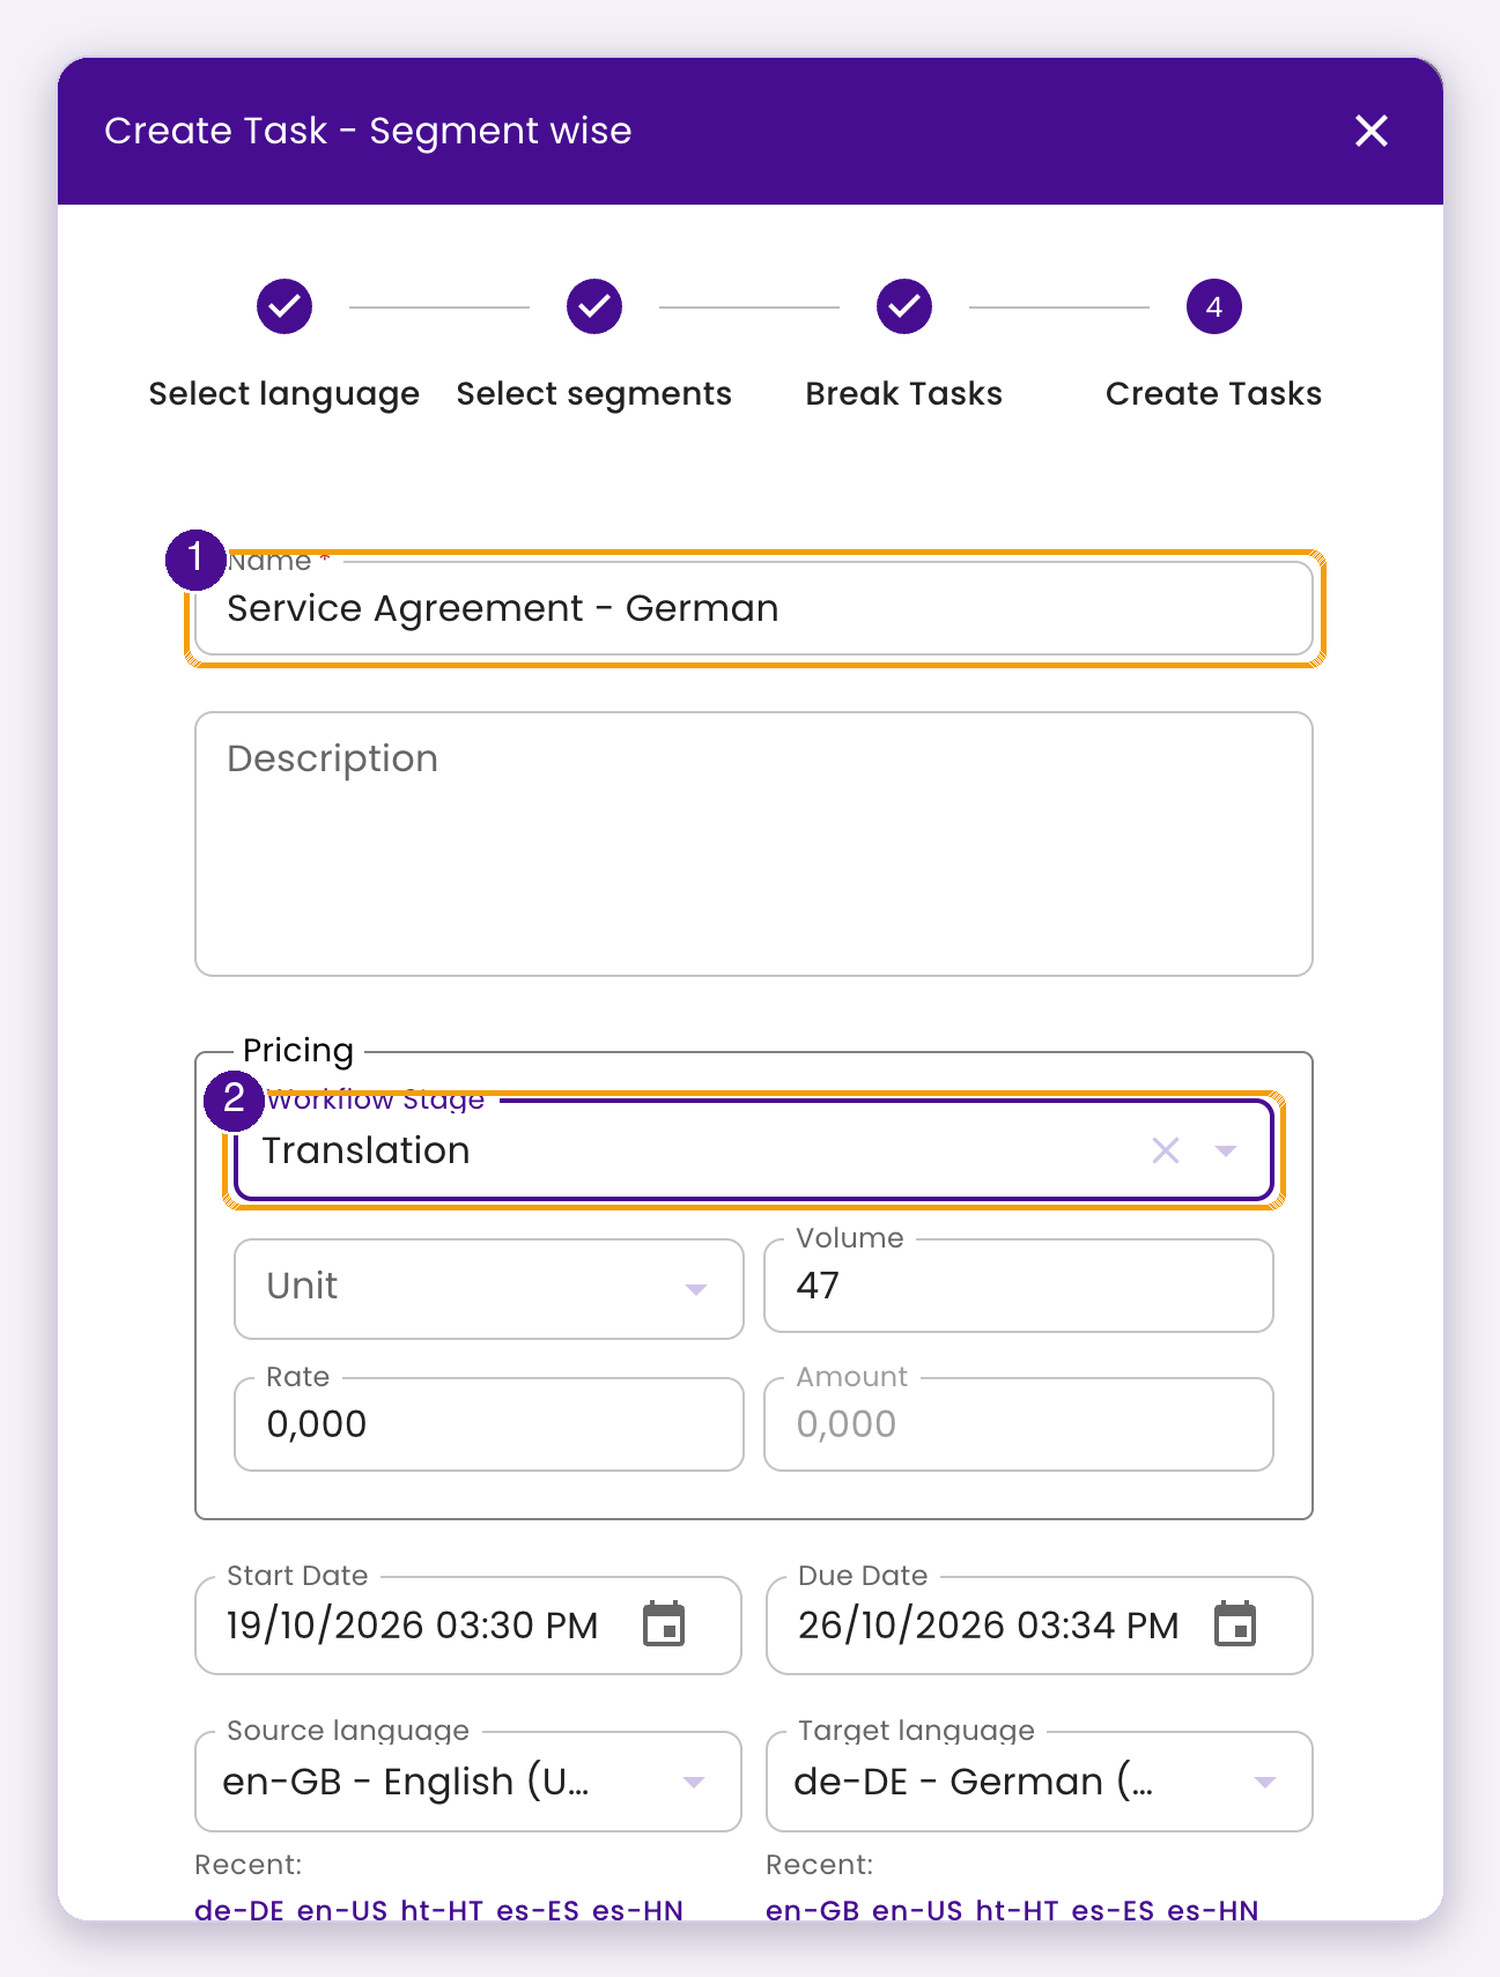
In the last step of the wizard, name the task and pick a workflow stage, then scroll down and click Submit.
Step 4: Translate in the editor
Section titled “Step 4: Translate in the editor”Start with machine translation: click the translate icon in the toolbar, choose DeepL or Microsoft (the two engine logos), select the target language and click Proceed. A review screen lists every segment with its machine translation; click Apply to all to fill the file. Then post-edit: double-click a target cell, type your changes and press Ctrl+Enter (Cmd+Enter on a Mac) to confirm and jump to the next segment. Run MT before you edit by hand, because Apply to all overwrites segments you have already translated.
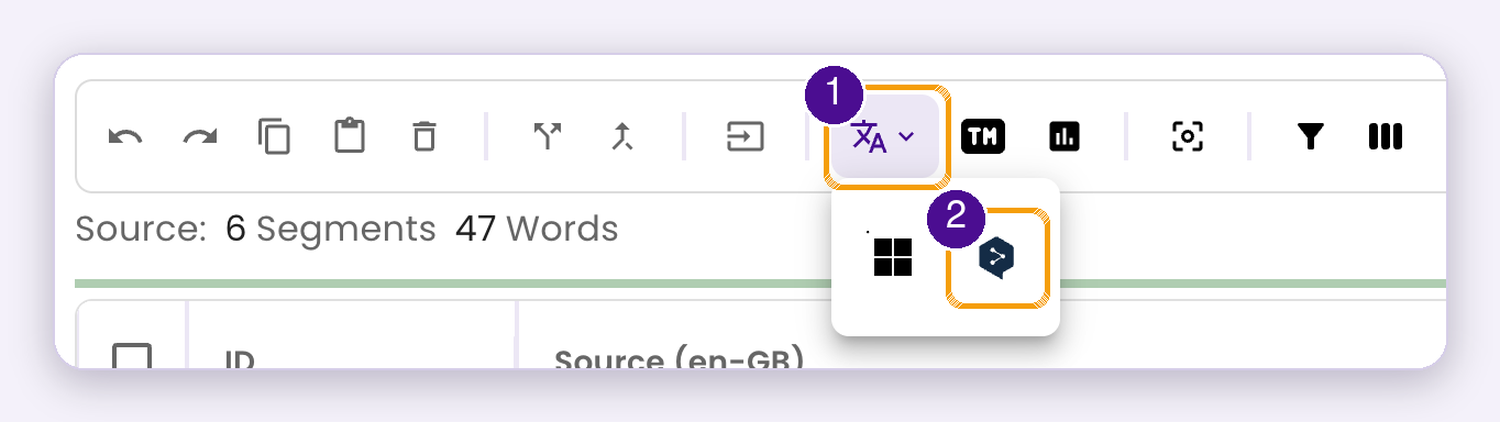
Open the translate menu and pick an engine.
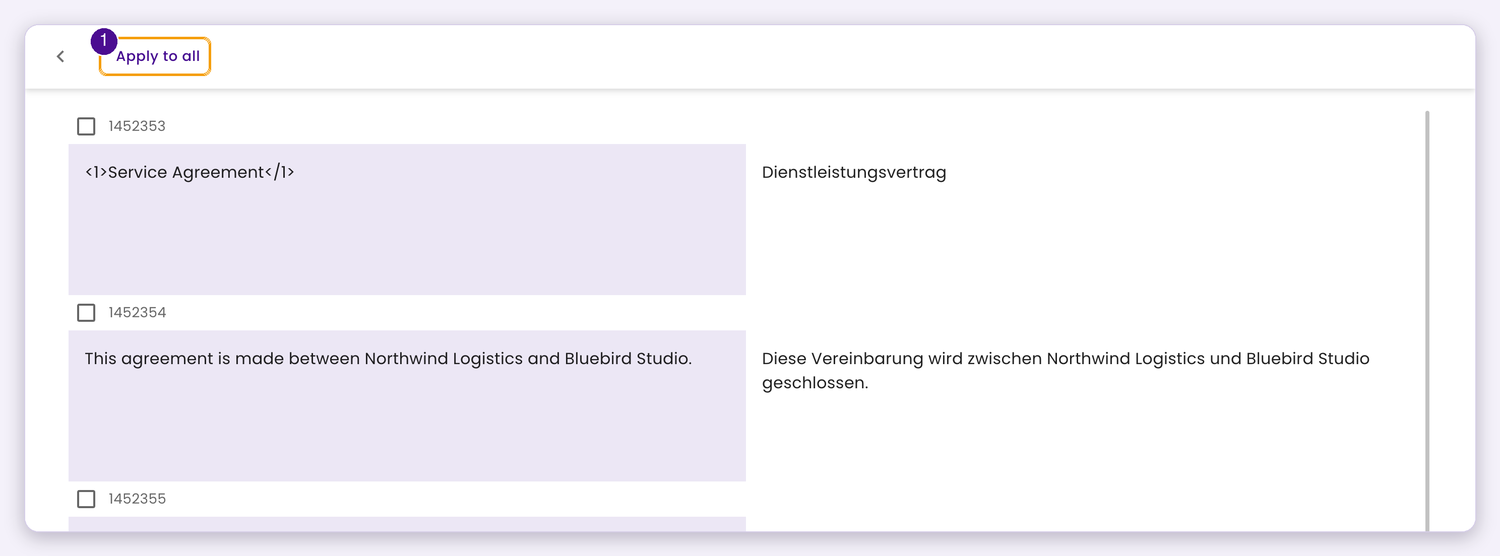
Review the machine translations, then click Apply to all.

Post-edit in the target cell. Keep the numbered tags around the text.
Step 5: Review and export
Section titled “Step 5: Review and export”When the translation is done, go to File > Download as > Download as Original, choose the language and click Submit. The export runs in the background. Your translated file appears under Completed Files in the project’s Files tab, named Completed-<your file>.docx. If it isn’t there yet, refresh the page after a few seconds.
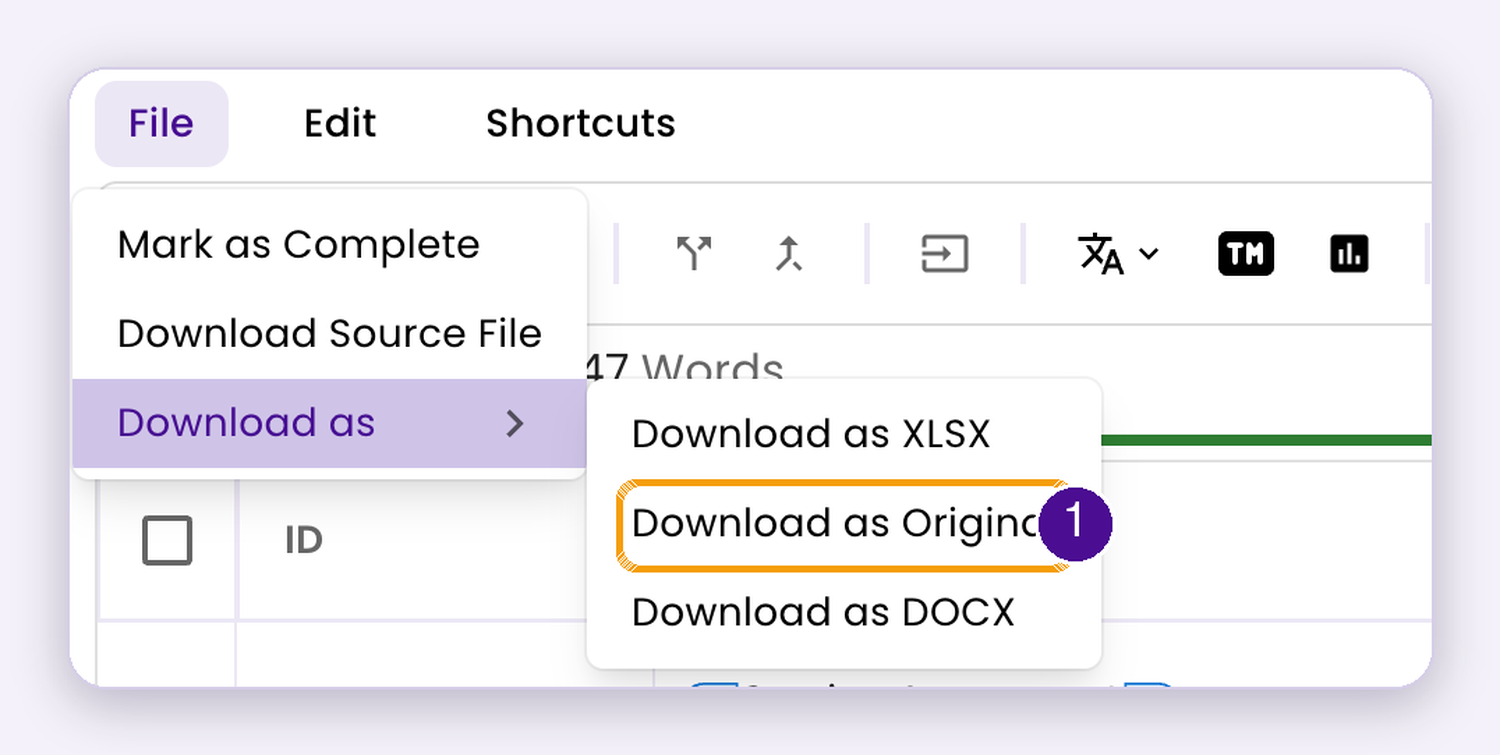
File > Download as > Download as Original.
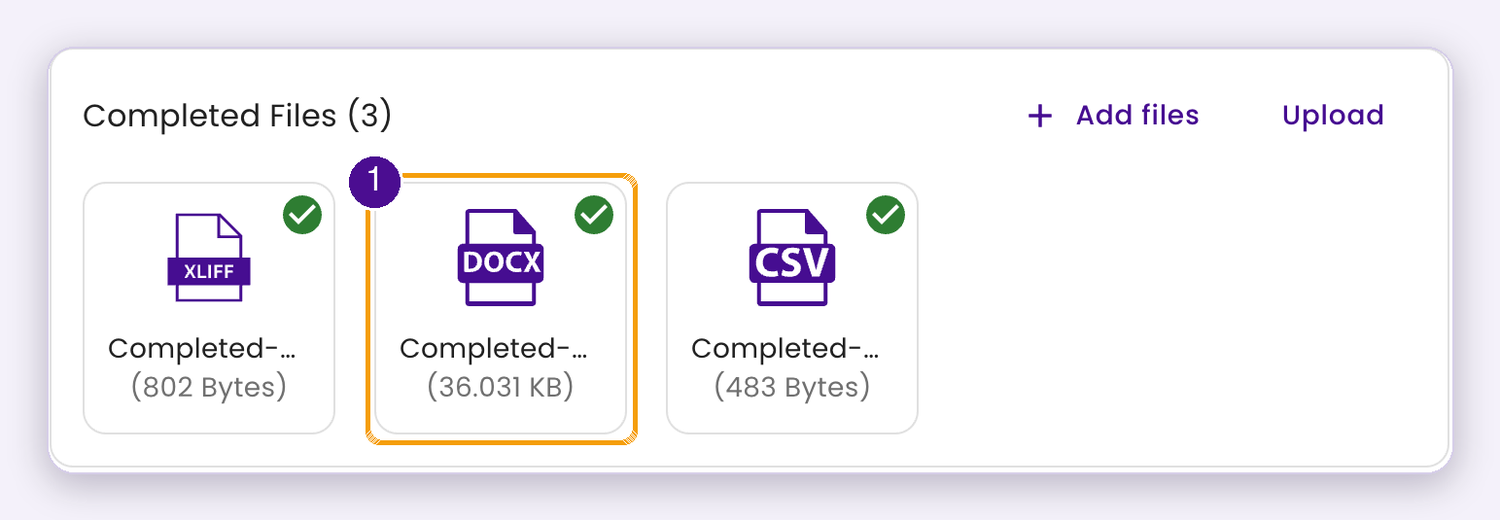
The translated DOCX appears under Completed Files.
Pro Tips
Section titled “Pro Tips”- Check tags before you confirm. If a tag goes missing, the matching formatting can be lost in the final file.
- Machine translation can drop tags, especially on short headings. If that happens, select the segment, click Insert from source in the toolbar to bring the tags back, then retype the text between them.
- Use merge and split in the toolbar when a sentence is broken across two segments.
- Pre-translate the whole file first, then spend your time on the segments that really need a human.
Benefits
Section titled “Benefits”- Faster turnaround, because nobody rebuilds the document by hand.
- Clear ownership: every file and task has an assignee and a status.
- Lower risk of layout errors in client deliveries.
Best Practices
Section titled “Best Practices”- Clean the source before upload: accept tracked changes and remove comments you don’t want translated.
- Avoid manual line breaks inside sentences; they split segments.
- Keep text in the document, not in images, or it can’t be translated.
- Do a final read of the exported DOCX in Word before delivery.
Final Thoughts
Section titled “Final Thoughts”DOCX projects should be the easiest part of an LSP’s week. With Awtomated you upload, translate and deliver a clean Word file without leaving the platform or touching a single tag by hand. Want to see it with your own files? Book a demo with the Awtomated team.
Ready to try it with your own files? Book a free demo or visit our website for more information about Awtomated.